
Accompanying guests are additional guests registered together with a main guest under the same booking. Learn how to activate accompanying guests in the admin, customise the registration form, manage capcity limits and waitlists, and more. Discover all details in our comprehensive guide.

Accompanying persons are additional guests registered together with a main guest under the same booking. They appear in the booking of the main guest, but no separate contact is created for them in the system. This means they cannot be contacted directly through campaigns or other notifications. They also do not receive their own booking confirmations or notifications. All communication – including the delivery of e-tickets, campaigns, and other messages – is always sent to the main guest.
To enable accompanying persons in your event, follow these steps:

Guests can add their accompanying persons directly during the booking process. They can choose which accompanying persons to assign to which options, while remaining within the quota defined in their authorisation group. It is also possible to join a waiting list or submit a booking request with accompanying persons.

In the Admin, accompanying persons always appear in the booking of the main guest. Under “Booked Options”, each person – whether the main guest or an accompanying person – is listed as a separate line. This makes it possible to cancel only the accompanying person’s booking or place them on the waiting list. Applying a filter for a specific booking option will display all guests, including accompanying persons, who have booked that option.

Accompanying persons count towards the main guest’s capacity limit. This means that the total capacity for a booking option cannot be exceeded when adding accompanying persons. For example, if a guest adds two accompanying persons, this counts as three guests against the capacity limit. If only one space remains for a particular option, the guest cannot add an accompanying person.
For waiting list bookings, the main guest and all accompanying persons are always treated as a group. An automatic waiting list invitation will only be sent when there are enough spaces available for the entire group. This invitation is sent exclusively to the main guest and covers all accompanying persons in the booking.
For any booking with one or more accompanying persons, the “Accompanying Persons” tab in the main guest’s contact record displays all details from the accompanying person’s registration form. These details – such as name or email address – can be edited at any time.

The booked options are managed directly within the booking itself. Each person has their own booking option, making it possible to amend only specific accompanying persons, for example by cancelling their booking or placing them on the waiting list.
When a booking is manually confirmed from the waiting list, the booking options must be confirmed for both the main guest and all accompanying persons. The same applies when sending a waiting list invitation: all relevant booking options must be selected. The invitation itself is sent only once, to the main guest, who can then confirm all spaces at the same time.

To add a completely new or additional accompanying person – rather than simply replacing an existing one – the booking must first be extended to include another guest. To do this, open the booking in the main guest’s contact record and select “Add booked options”.
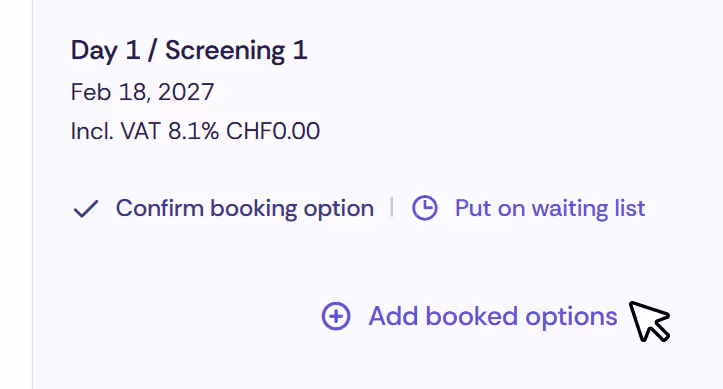
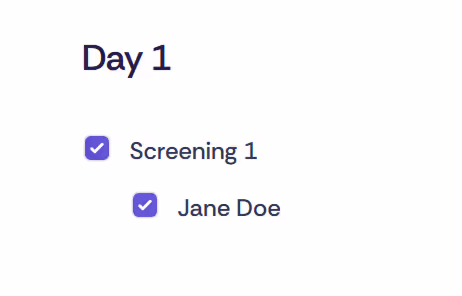
First enter the new accompanying person’s details, then select the desired options and tick the checkbox next to their name.
To remove an accompanying person from an existing booking, open the booking in the main guest’s contact record. The accompanying person’s booking option can then either be cancelled or, if the event has a waiting list, moved to it. Once cancelled, the accompanying person is removed from the booking, while the main guest’s booking options remain unchanged.
The e-ticket for an accompanying person is always sent to the main guest. If the “One e-ticket per total booking” setting is enabled, the main guest receives a single ticket covering all guests in the booking. If the “One e-ticket per booking option” setting is used, each person receives their own ticket with a unique QR code, but all tickets are still sent to the main guest.
In the Check-In app, all guests – main and accompanying – are listed. Accompanying persons are marked with an icon and a note. If a per-booking ticket is scanned, all members of the booking are checked in simultaneously. If someone is missing, their check-in can be removed and completed later. With per-sub-booking tickets, each guest must be checked in individually.
Badges are also generated for accompanying persons when they are enabled for an event. With the Print@Home option, the main guest receives all badges to print themselves. When badges are printed using the Check-In app, they are produced when tickets are scanned – either all at once or individually, depending on the e-ticket settings.
Discover exciting articles about creating unforgettable events.


