
Invitation to a company party: Templates & text blocks for every occasion

Anna Fredholm
June 19, 2026
•
4
min

Contact management plays a crucial role in event organisation. In this article we will explain the main features of contact management in Oniva, from creating individual contacts to organising contact groups.

Guest management in Oniva helps you keep track of all the information about people who are attending, or might attend, your event. This way, you always have a clear overview of your guest list and event participation.
In Oniva, you can add contacts in three ways:
💡 Tip: Each contact automatically receives a personalised event link, giving them access to your event.
In Oniva, contacts and bookings are managed separately, but always closely linked. Contacts contain all information and personal data about individuals who are attending or might potentially attend your event, regardless of whether they have already registered. Bookings, on the other hand, are the actual registrations made by participants and provide an accurate overview of the booked options. While contacts give a comprehensive view of all individuals, bookings provide detailed information about each participation. In certain event configurations, a single contact may also have multiple bookings, for example for different sessions or ticket types.
In Oniva, you can add contacts in two ways: via an Excel import or by transferring existing accounts. If accounts already exist for your target group (e.g., employees), you can import them directly. Stored data such as language, gender, or username will be automatically transferred. This increases security, as only registered users gain access. See the article on internal events. Events can be restricted to accounts via authorisation groups.
If you want to add new people to your contact list, you can upload their data via an Excel import. The order or naming of columns does not matter, as you can assign them to the correct Oniva data fields during the import process.
Important formatting requirements:
Deviating values (e.g., "Female" or "German") will be skipped.

If multiple authorisation groups exist, the appropriate group must be selected during the import. When importing from existing accounts, select an account group for the import.

During the import, you can specify what should happen to the data:
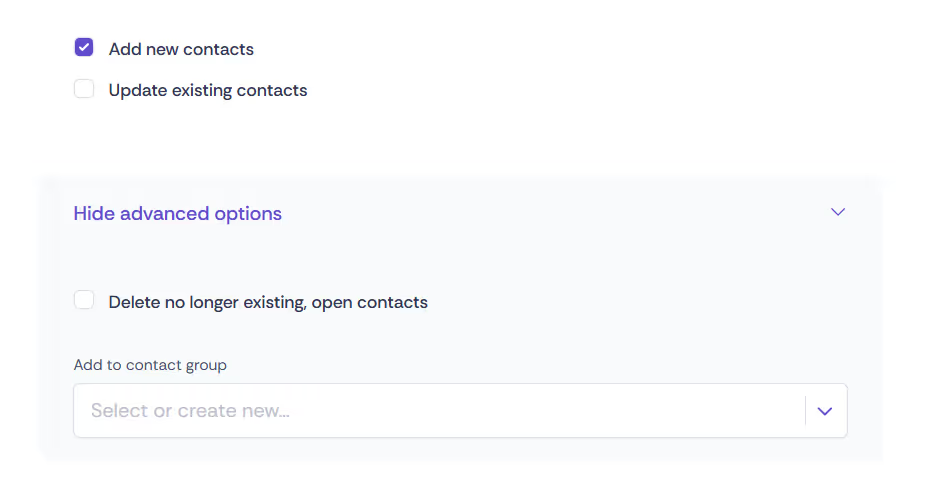
During the import, you can directly assign contacts to a contact group. Further information can be found later in the article (section "Contact groups").
After selecting the file, you must assign the Excel columns to the appropriate Oniva data fields. Unassigned columns will not be imported. If you need custom fields such as CRM number, account manager, or keywords, create them in the registration form beforehand. If these fields should be visible only to you but not to guests, activate the "Hide for contact" option.
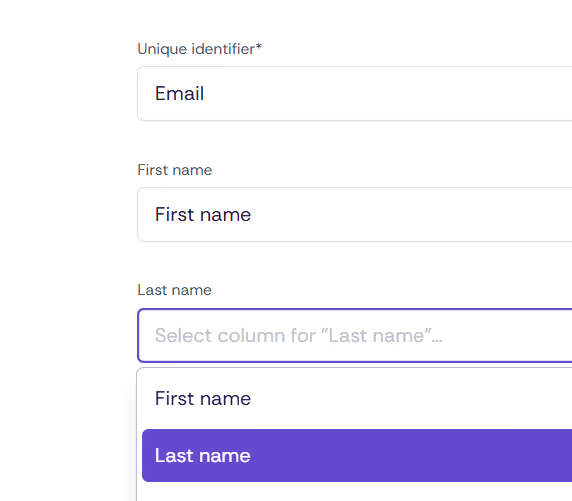
The identifier is used to uniquely recognise a contact and determines whether an existing record is updated or a new one is created. Suitable identifiers include email address, customer number, or employee number, as for example names can appear multiple times. If a contact registers themselves without an invitation, the system automatically generates a random 16-character ID. Identifiers can be exported along with the contacts.
In addition to custom fields, the following fields are available by default:
👉 Note: Only the identifier is mandatory. All other fields can be left empty during the import and completed by the guest. The more data you import, the less the guest has to fill in themselves.
Before importing, you can review the data of the first contact. If everything looks correct, you can start the import. Once completed, the status will be available in the import log.

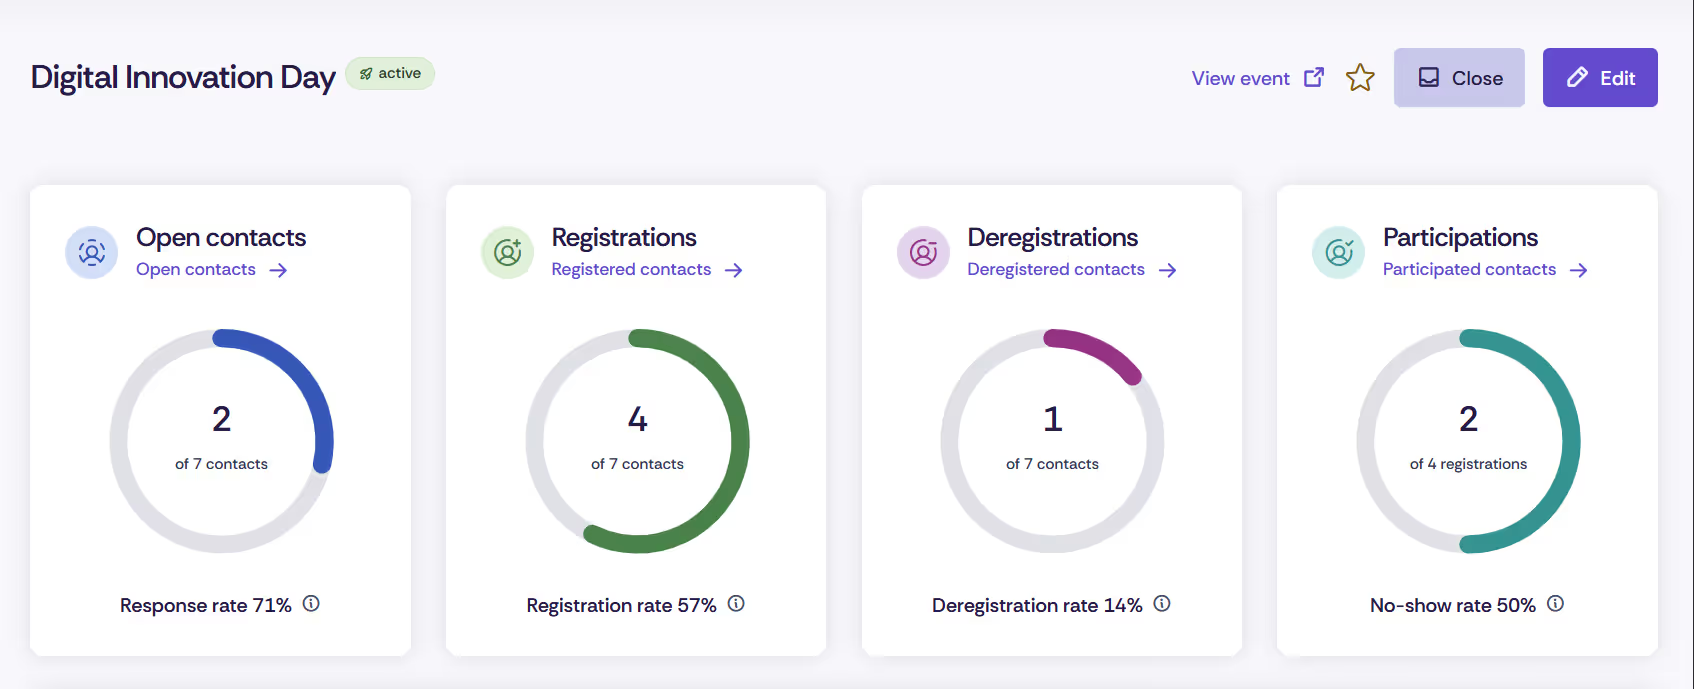
Each contact has a contact status. Contacts are displayed in the dashboard broken down by contact status.
With contact groups, you can organise your contacts into subgroups to manage them more efficiently and target them more effectively. You can create contact groups directly in the Contacts menu.
You have two options:
Once you’ve made your selection, you can add the contacts to the desired contact group using the bar at the bottom of the screen.

Alternatively, you can assign a contact group directly when importing contacts. In the advanced options of the import process, you can either create a new group or select an existing group. If you want to create a contact group based on criteria other than the available filters, you can also do this via an import. To do so, prepare an Excel file containing all contacts to be added to the group. It is important that each contact has a unique identifier.

To add contacts to a contact group via an import after the group has been created, follow these steps:

After the import is complete, all contacts will be automatically added to the contact group. To remove a contact from a group, open the contact and adjust the contact group assignment. You can also add individual contacts manually to a contact group in the same way.
To narrow down your contact list, several filters are available. You can combine multiple filters to refine your selection further.
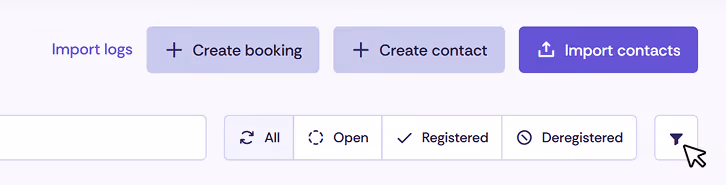
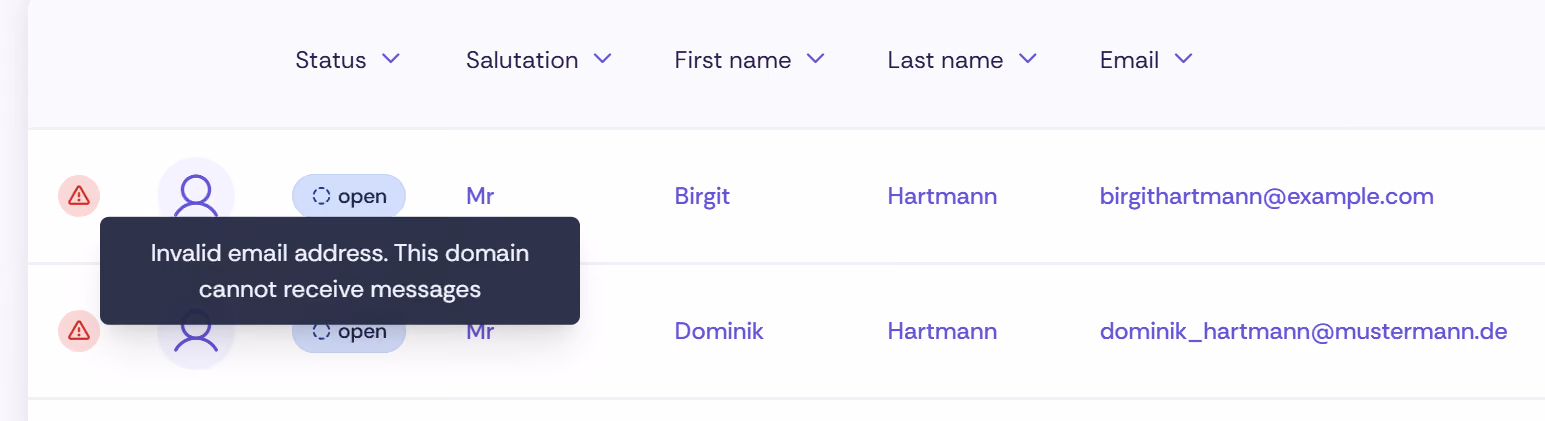
Invalid contacts can be displayed using the quick filter. The reason for the error is shown when you hover over the relevant contact.
💡 Note: Limited error evaluation when using a custom SMTP server
Full evaluation of bounce notifications — i.e. the error categories "Emails undeliverable" and "Emails temporarily undeliverable" — requires the use of Azure Communication Services, which is integrated into Oniva by default. If a custom SMTP server is used instead, only errors in the category "Invalid email address" can be evaluated.
A contact is considered erroneous if the stored address is unable to receive emails. The following error causes are possible:
Missing email address: No email address has been stored for this contact. Without an email address, no campaigns can be delivered.
Invalid mobile number: The stored mobile number does not match the expected format and cannot therefore be used for SMS delivery.
Invalid email address
Emails undeliverable
Emails temporarily undeliverable
Delivery attempt failed
Using the "Duplicates" quick filter, you can display contacts that appear more than once in the system. Removing duplicates is done manually: review the displayed entries and delete any contacts that are not needed to keep your contact list clean.

⚠️ Warning: Deleting contacts cannot be undone.
If information appears in multiple columns, it indicates that the record in the registration form isn't linked with the correct identifier. The system doesn't recognise that the information in both columns corresponds to the same data. To ensure proper linkage of guest data, always work with a predefined identifier from the system where available. By default, the following identifiers are defined: title, function, firstname, lastname, organization, phone_mobile, image, job_title, badge_info, email, street, zip, city.
Empty rows with the status "Accessed" occur when a user opens the event website and clicks "Register" but either cancels the booking or does not enter any data within 15 minutes. These entries have no impact and can be deleted if unwanted, but they often provide useful insights. For example, they show how many users visit the page without completing their booking – potential reasons could include a high price, a lengthy registration form, or an unsuitable event date.
If the number of contacts doesn't match the number of campaign recipients, it could be due to the following reasons:
Contacts list all contacts regardless of their booking status, while Bookings list all confirmed bookings.
Discover exciting articles about creating unforgettable events.

