
Related articles
Table of contents
Registration form and additional queries
Efficiently collecting guest information is crucial for smooth event organisation. In Oniva, you can use the registration form and additional queries to systematically gather all relevant information.

Registration form and additional queries in Oniva
Efficient guest data collection is essential for successful event management. Oniva provides the registration form and additional queries to systematically and purposefully collect relevant information.
Data collection structure in Oniva
Oniva uses three key elements:
- Contacts: Individual persons or entities stored in the event database.
- Bookings: A booking represents a contact's registration for a specific event and links them with booked options.
- Booked Options: Specific components of a booking that are tailored to the individual requirements of the event.
💡 Tip: Each booking is always linked to a contact and can include multiple booked options.
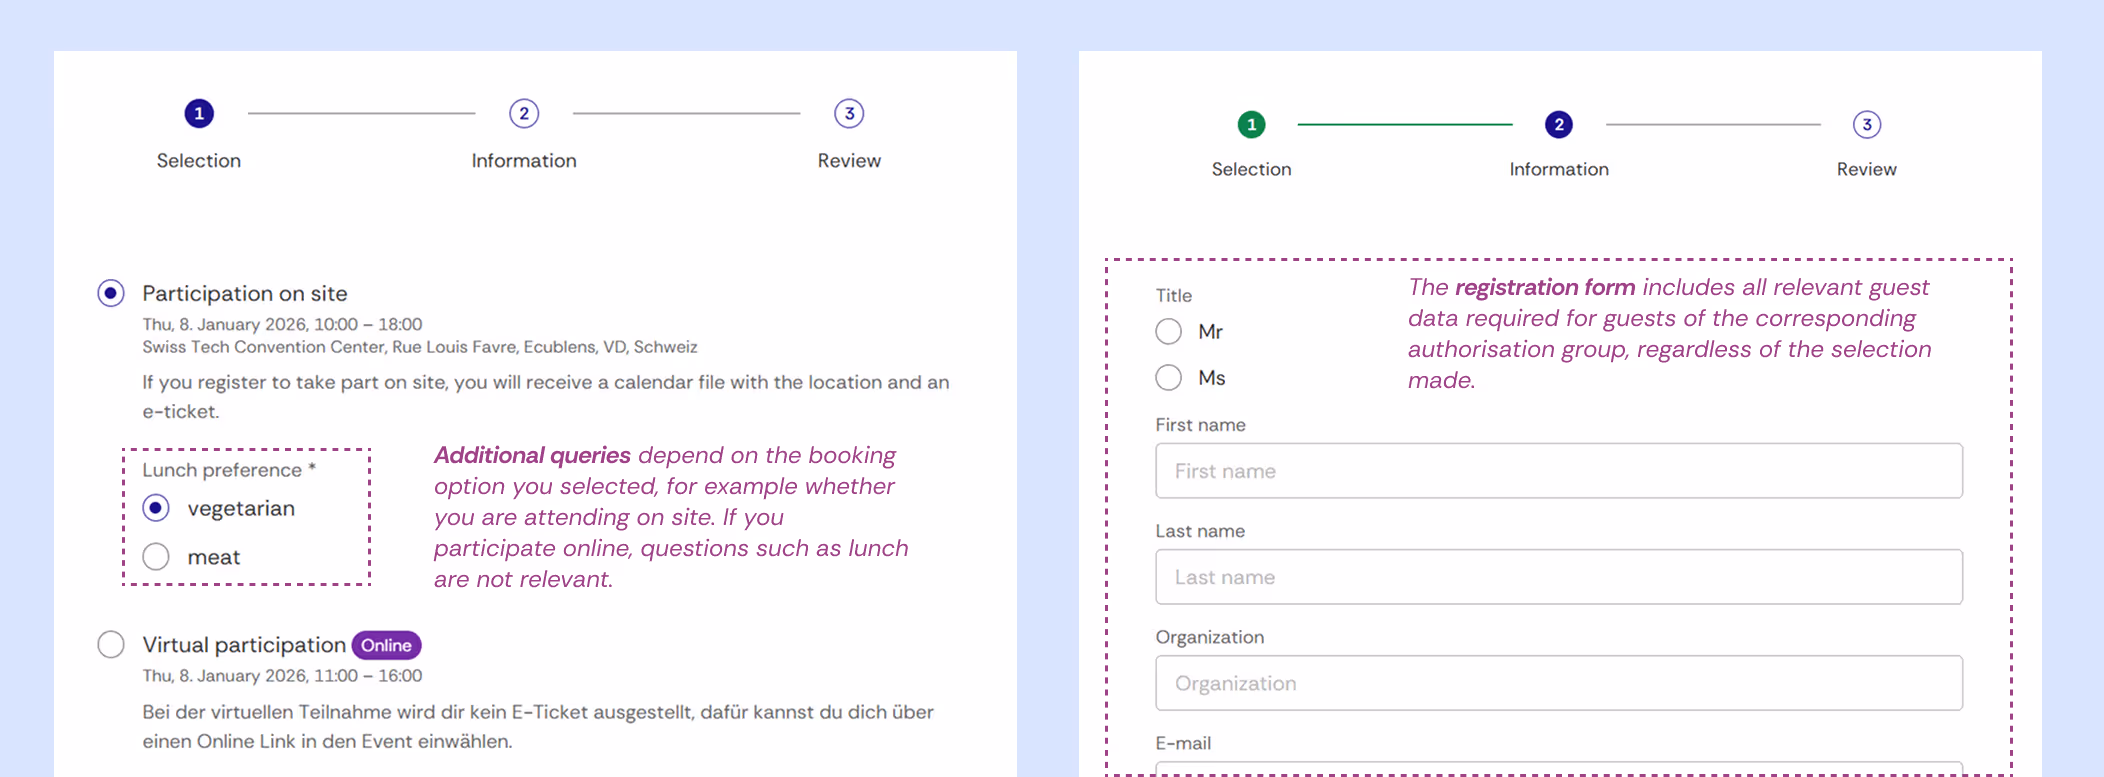
Registration form
The registration form is a standardised form for collecting general information relevant to all guests. This includes:
- Mandatory fields like name and email address, which all guests in an authorisation group must complete.
- Customisable fields for specific requirements depending on the authorisation group, such as department or client representative for internal and external guests.
💡 Tip: Events that are restricted to accounts do not require a registration form, as contact details can also be taken from the account.

Additional queries
Additional queries are optional fields that appear when booking certain options, gathering specific information only for individual bookings. For instance, dietary preferences for lunch or workshop preferences can be collected. They provide:
- Flexibility for individual booking options.
- Tailored questions that only appear when the respective option is selected.

Different data storage
- Registration Form: Data is linked to the contact (person) and is generally applicable.
- Additional Queries: Data is booking-specific and captures situational information.

Configuration of form fields
All fields follow the same configuration logic, whether in the registration form or additional queries:
- Label and input type (e.g., text, selection, file upload) define the content.
- Predefined values and placeholders provide guidance for input.
- Required field setting and hide for contact allow flexible field customisation.
Custom identifiers and hidden fields are also available if needed, such as for internal notes or client numbers.

Regardless of whether you’re setting up additional queries or fields in the registration form, all form fields follow the same logic. When creating a new field, you can choose to import a template or create a new field. Templates can be created and edited in your workspace.
After creating or opening an existing field, you can configure the following settings:
- Label: This text appears above the field for your contacts.
- Input field: Define the input type here. The following options are available: Single line text, multi-line text, email address, date, checkbox, single selection, multiple selection, file upload, image upload, text line without input (for example, as section headers).
- Value: You can specify a predefined value here, which guests can overwrite. Use this field if the default value will usually be the same or in single or multiple selections. For single and multiple selections, the different options must be specified in the "Value" field, separated by commas. → Example: Option 1, Option 2, Option 3.
- Placeholder: The placeholder appears in the field but disappears when a contact clicks on the field.
- Required field: Defines if the field is required or not.
- Form field identifier: For proper guest data linking, always work with a system-predetermined identifier if available. The following identifiers are predefined by default:
title, function, firstname, lastname, organization, phone_mobile, image, job_title, badge_info, email, street, zip, city. - Hide for contact: The input field is not visible to guests. Only admins can see and edit this field, suitable for client numbers, notes, etc.
Labels and text fields (including checkboxes) are limited to 255 characters. Up to 2,000 characters can be added for static text.
When importing new contact data, Oniva skips all columns in the Excel file that are not actively linked to a field in the registration form. If this information is required, the corresponding fields must be created in the registration form beforehand. If they should not be visible to contacts during the booking process, the fields can be marked as “hidden”. This allows, for example, the addition of fields for values such as “Comment” or “CRM number”.
Form templates
If your events require recurring form fields, it is recommended to create form templates at the workspace level. These templates can be imported into any event within the workspace and reused as needed. After import, the forms can be customised or overridden individually for each event.
Alternatively, you can create templates for just specific form sections, for example:
- a set of questions regarding data protection
- a group of questions on dietary requirements and food intolerances
Using form templates is particularly useful when field names need to be consistent, as this simplifies the processing of data after export to a CRM system.
Creating form templates
Form templates can be created by workspace admins or users with higher permissions. If you are unable to edit your workspace, please contact your designated admin or the Oniva Support Team.
The workspace can be accessed via Settings in the top-right corner of the admin area.For instructions on how to create and edit form templates, see this article.


