Icon with an “X”.
Warn Icon
Third-party cookies required
Your browser's security settings do not allow third-party cookies. Please adjust your browser's security settings or try a different browser to view this content.
By clicking “Allow,” you agree to the storage of cookies on your device to improve page navigation, analyze site usage, and support our marketing efforts. For more information, see our cookie policy.
Decorative icon
Decorative icon

Articles by topic

Online events & live streaming

Frequently asked questions

Decorative icon

Related articles

Table of contents

Last updated:
July 30, 2024

Edit event

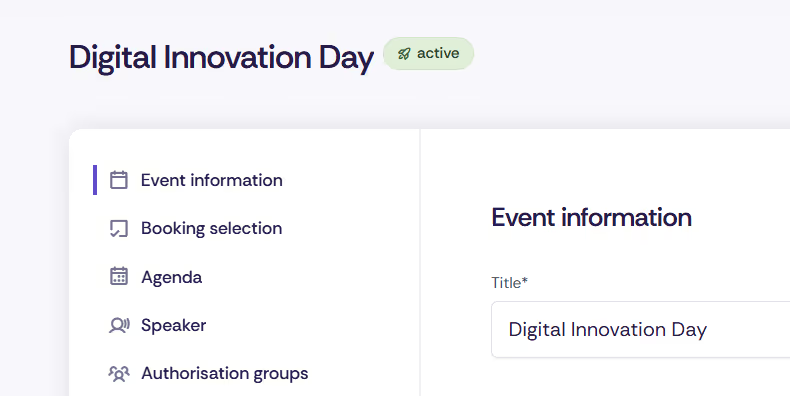
Configuring an event in Oniva involves steps such as editing event information, defining booking options, designing the agenda, capturing speakers, and setting up authorization groups.

Screenshot of editing events in Oniva.

Overview

In addition to the settings, the most important configurations for an event are made under "Edit event". When the edit mode is opened, five sub-items appear on the left side.

  • The event information defines all higher-level configurations for the event. Here you can define the main information such as title, location, event image or event description.
  • In the booking selection, you define which registration options are available for your event.
  • In the agenda you can enter your event program and display it clearly. If no agenda items are entered, no menu tab will be displayed on the event website.
  • The speakers feature allows you to showcase the most important people at your event on your event website. If you do not enter speakers, no menu tab appears on the event website. Speakers can also be linked to agenda items.
  • Authorization groups define who is allowed to book an event and under which conditions.

Everything about event information can be found in this article. All information about the booking selection, the agenda & speakers and the authorization groups can be found in the corresponding articles.

Event information

The event information sets all the higher-level configurations of the event. For example, the event title, location, or event image are set here.

  • Title: Displayed on the event website, calendar file, e-ticket settings, and booking confirmation.
  • Layout:There are two layouts available for the event website.
  • Header image:The event image is displayed at the top of the banner of the event website (optimal image format standard 1000x800px, for widescreen 1800x800px).
  • Venue: In the venue field, a predefined venue can be selected from the event venue list or a new venue can be entered via Google Maps. When holding an online event, no location needs to be filled in.
Tip: Repeated setting of venue
In Oniva, venues can be entered flexibly at different levels: either in the event information, in the booking options, or for specific dates. For example, a single booking option, such as a VIP cocktail reception, can be held at a different location than the rest of the event. If possible, we recommend that you do not enter multiple venues to avoid redundancy. If all options are at the same location, you only need to enter the venue once in the event information.
  • Organizations: Organizations that act as organizers on the event website. Organizations can be entered on the event type and then linked in the event.
  • Contact persons: Contact persons who act as organizers on the event website. All existing accounts can be saved as a contact person. People without an Oniva account cannot be named as a contact person.
Tip: Event manager vs. contact person
The person responsible for the event in Oniva controls the authorization for the event and can receive notifications (if configured). On the other hand, the contact person is displayed on the event website for guests and can be contacted in case of questions.
  • Categories: Category of the event. Categories can be entered in the workspace and then linked in the event.
  • Description: Description of the event on the event website and in the calendar file.
  • Online event: Marks the event as virtual and allows you to add a video stream or a link to an external video solution.
Tip: Repeated setting of online events
An event can be marked as fully online by activating the “Online event” option in the event information. Alternatively, only certain booking options can be marked as online by only activating this option. This configuration is useful for hybrid events or online events with different sessions. See article on virtual events.
  • Additional content: With additional content, additional content such as images, links and documents can be placed on the event website.
Download Icon

Was this article helpful?

Thank you very much! Your feedback has been recorded.
Huch! Beim Absenden des Formulars ist etwas schief gelaufen.
Helpful information for event managers

Discover exciting articles about creating unforgettable events.

Didn't find an answer?

If you couldn't find the information you were looking for, our support team is happy to help. Create a ticket, and we will get back to you as soon as possible.
Decorative icon
Support hours
Monday to Friday, 08:00 to 17:00
(excluding public holidays in the city of Zurich)

Contact support

Warn Icon
Third-party cookies required
Your browser's security settings do not allow third-party cookies. Please adjust your browser's security settings or try a different browser to view this content.

Refunds

Refunds are subject to a fee of CHF 2.50 per transaction in addition to the processing fee. Whether this fee will be borne by the guest or the organizer can be determined by you. The refund will then be processed for the full or partial amount. Ideally, you should specify this in your guest terms and conditions.
Warn Icon
Third-party cookies required
Your browser's security settings do not allow third-party cookies. Please adjust your browser's security settings or try a different browser to view this content.